The Most Important Aspect of Espresso Brewing
What is the Purpose of the Razor Tool?
Razor Tool Put to the Test
Integrated Conical Burr Grinder Put to the Test
Should You Use the Breville Razor Precision Dose Trimming Tool?
Alternative Way to Use the Razor Precision Dose Trimming Tool
How to Set Up the 2 in 1 Distributor and Tamper Using the Razor Tool
The Most Important Aspect of Espresso Brewing
Before we dive into the Breville Razor tool, let’s look at the most important aspect of espresso brewing which is consistency, since this will help us understand whether the Razor tool can help us in this regard.
CONSISTENCY – How similar our dose, tamping pressure, grind size, water temperature, yield, etc., are from one shot to the next.
Let’s say you want to reduce some of your espresso’s bitterness, so you decide to grind coarser (as one of the ways to achieve this). However, if your dose of coffee, tamping pressure, yield, etc., is inconsistent, then how can you tell whether the coarser grind is actually reducing the bitterness of your espresso or not? The answer is you can’t, and that’s why consistency is key.
If you want consistently tasty espresso, you need to be consistent during the espresso extraction process.
What is the Purpose of the Razor Tool?
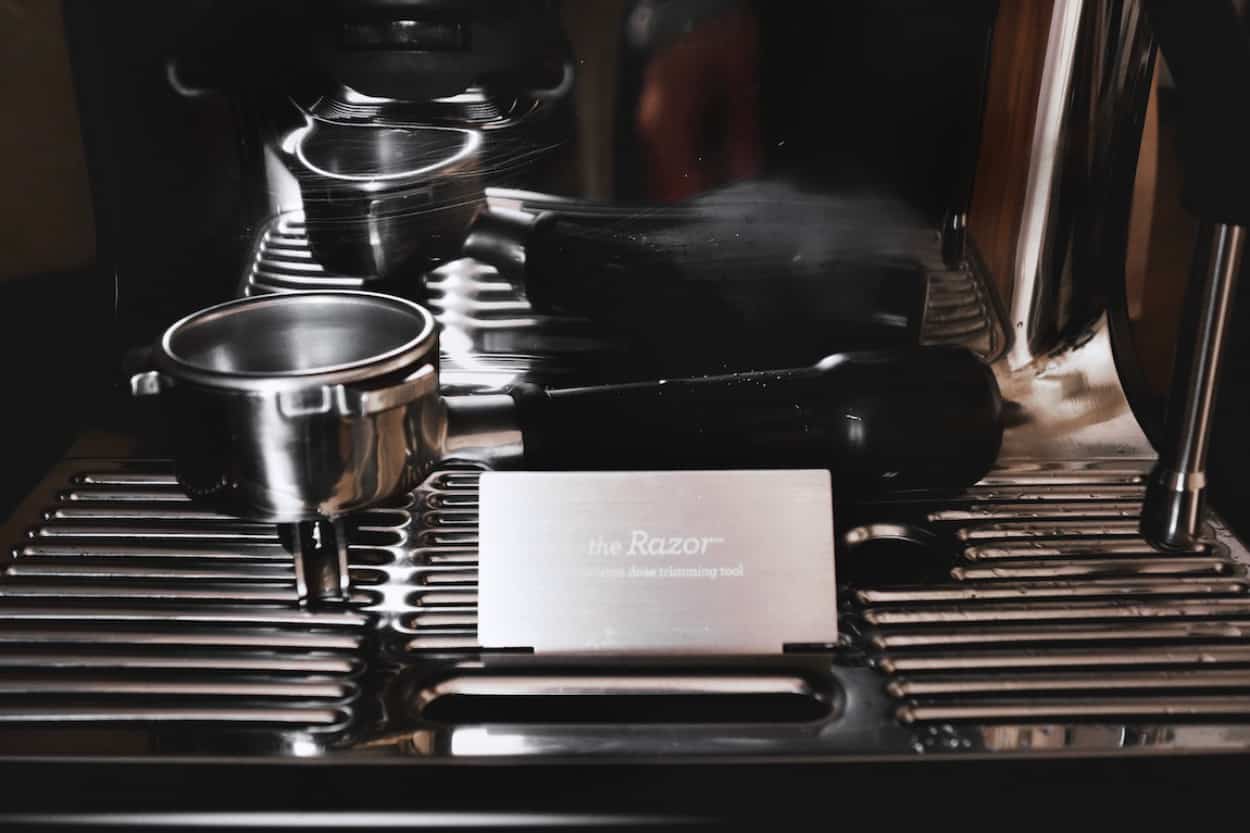
According to Breville, the Razor tool should help you trim down the coffee puck to the correct level in order to achieve consistent extraction. While I’m glad Breville is trying to help you improve your consistency, I would argue that the Breville Razor tool is not the best way to go about it. To understand why let’s take a look at the following test.
Razor Tool Put to the Test
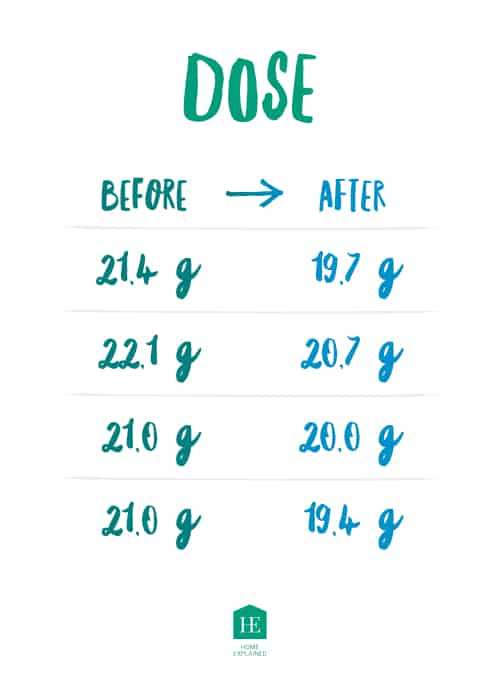
In my experiment, I’ve tried to trim down four doses of ground coffee with Breville’s Razor Tool. I’ve used the same grind settings for all four doses to minimize any chance of inconsistency.
For the first two doses, I’ve used different amounts of coffee and tamped with included Breville tamper. For the following two doses, I’ve used the same amount of coffee and used a palm tamper to ensure identical tamping pressure. All four doses were trimmed with the Razor tool until I could not scrape off more coffee from the puck.
You can see the results on the following image.
In fact, I would even go as far as to say that using the Breville Razor tool could actually make your inconsistency worse. To prove that, I decided to measure how precise is the time-based integrated grinder.
Integrated Conical Burr Grinder Put to the Test
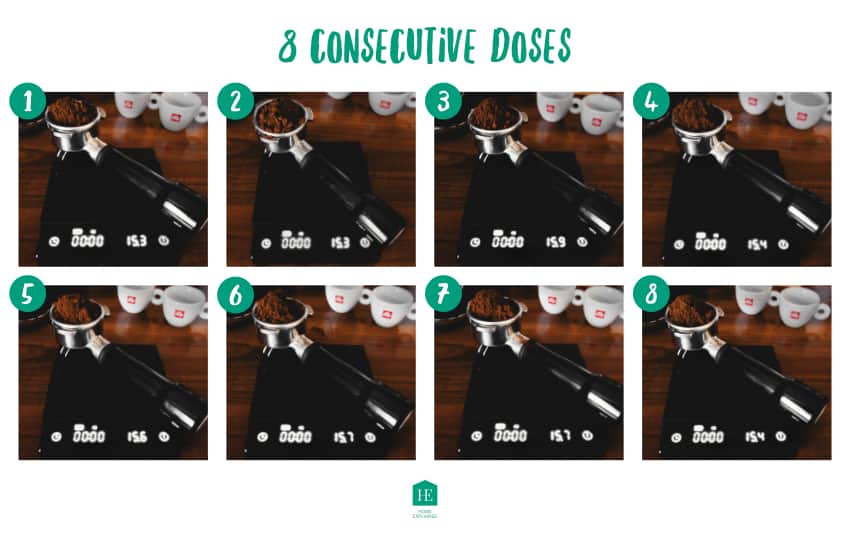
To find out how precise in dosing is the integrated conical burr grinder, I’ve decided to grind and weigh eight consecutive doses of coffee one after another to see how much variation there is.
For all eight doses, I used the same grind settings (grind size 6, grind time 10 seconds) and made sure the hopper had enough beans to grind all eight doses in a row without having to refill it.
Here are the results:
Should You Use the Breville Razor Precision Dose Trimming Tool?
No, you shouldn’t. As demonstrated in my experiment, the Breville Razor tool will not help you achieve more consistency in your espresso brewing process. Furthermore, it will disturb the even surface of the coffee puck after tamping, which can lead to uneven extraction and problems such as channeling.
If you’re not very picky about the taste of your coffee, it is good to realize that you’ll achieve more consistent results if you simply choose to use the time-based grinder alone.
For the coffee lovers who truly care about the taste of their coffee, the best way to achieve consistency is by using a precision coffee scale (Amazon link) and the 2 in 1 distributor & tamper (Amazon link). To learn more about how these tools can help you make a better-tasting coffee and other helpful tips, check out our Ultimate Guide to Breville Barista Pro.
Alternative Way to Use the Razor Precision Dose Trimming Tool
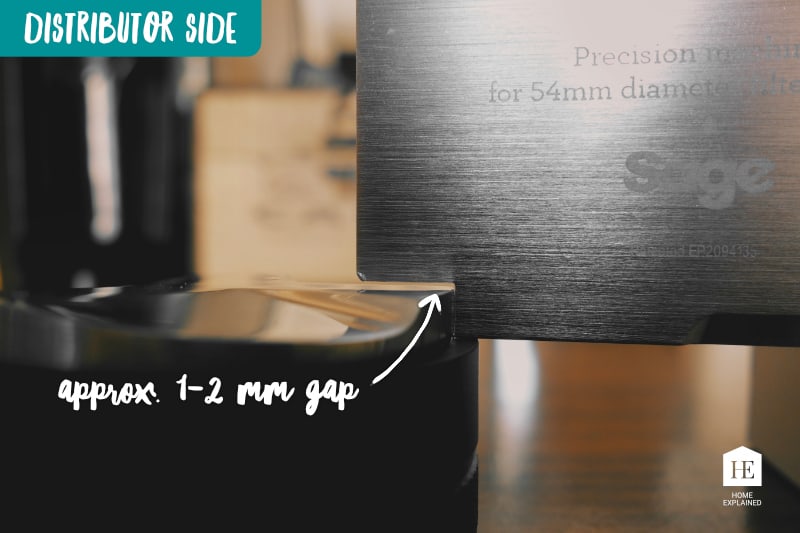
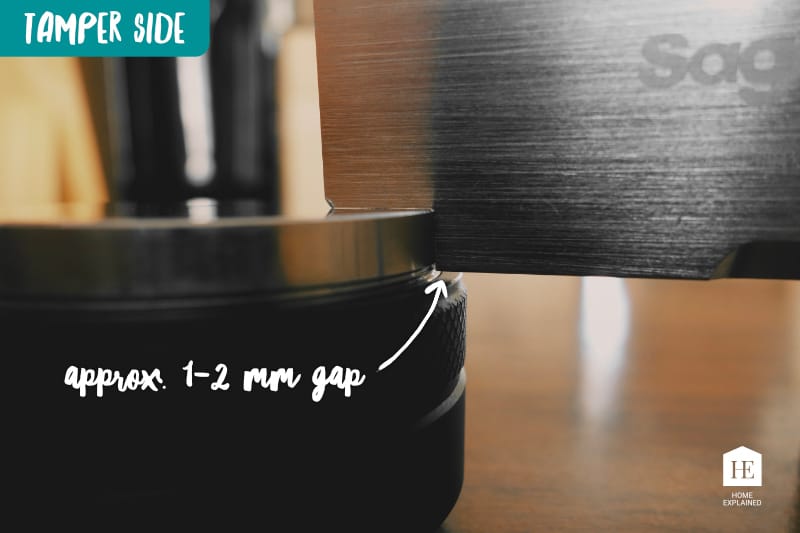
The best way to use the Breville Razor tool is to use it as a gauge to help you set up your 2 in 1 coffee distributor and tamper correctly. The Razor Tool’s edge should be the minimal tamping depth you aim for. Otherwise, your coffee puck will come in contact with the group-head, which could scorch the coffee.
How to Set Up the 2 in 1 Distributor and Tamper Using the Razor Tool
- Set the distributor side slightly higher (1-2 mm) than the Breville Razor tools edge. This will ensure that you can evenly distribute the coffee.
- Set the tamper side slightly lower (1-2 mm) than the Breville Razor tools edge. This will ensure consistent tamping depth.
If you want to learn more about setting up your 2 in 1 palm temper and coffee distributor tool, check out our dedicated article, where we cover everything you need to know.




0 Comments