
Table of Contents
How Do You Make the Perfect Shot of Espresso with Breville Barista Pro?
Getting the Perfect Shot – Case Study
6 Steps to a Perfect Espresso:
1. Correct time of extraction
2. Leveled and consistent tamping
3. The right dose of coffee
4. Proper grind settings
5. Optimal water temperature
6. Consistent yield
How to Steam/Froth Milk with Breville Barista Pro
How Do You Make the Perfect Shot of Espresso with Breville Barista Pro?
Understanding the espresso brewing process and its aspects is essential for every home barista who wants to fine-tune the espresso taste according to their preferences. Tasty espresso is not only a delicious coffee drink by itself but also a foundation for dozens of other coffee drinks, and that’s why getting it right is so important.
Making espresso is nothing more than extracting soluble materials from the ground coffee. However, multiple factors such as dose, grind settings, yield, temperature, time of extraction, and tamping affect how well the process goes. To put it simply, in order to get the perfect tasting espresso, we want to extract as much “coffee goodness” from the beans as possible without going too far in the extraction process. To better illustrate the correct process of espresso extraction, we have prepared the following chart.

Despite being quite obvious, it is important to stress that the resulting taste of the coffee will only be as good as the coffee beans you use. Therefore it is critical to buy fresh and high-quality beans from a local roaster or a cafe. Without these preconditions, you will have a hard time dialing in and extracting a tasty cup of coffee. If you want to learn more about choosing the right beans for your Breville Espresso machine, check out our dedicated article.
Getting the Perfect Shot – Case Study
CASE STUDY: To better illustrate how the process of dialing in works, we have prepared a case study of the espresso extraction process of 3 consecutive shots. We pull the shot, analyze the result, make some adjustments and continue until we achieve an espresso that tastes according to our liking. The case study is always outlined in a yellow box such as this one.
If you want to follow along, you should use a standard Single Wall basket for double shots (2 cups), as this is a generally accepted approach to brewing espresso among baristas. By using a basket for 2 cups, you will be able to dial in your cup of coffee more easily and consistently than if you would use a basket for 1 cup.

6 Steps to a Perfect Espresso
The 6 most important factors to pulling great espresso shots are:
- Correct time of extraction
- Leveled and consistent tamping
- The right dose of coffee
- Proper grind settings
- Optimal water temperature
- Consistent yield
If any one of these is off, your shots will lose some flavor, and as a result, they won’t be as tasty as they could be.
“If you want consistently tasty espresso, you need to be consistent during the espresso extraction process.”
What is the Goal?
For illustration purposes, let’s say that the perfect espresso is achieved by brewing a 17,5g (0.62 oz) of ground coffee, which will yield a 35g (1.23 oz) of espresso in the cup extracted in 28 seconds.
Initial Setup of the Breville Barista Pro
Coffee: Brazil Berrador Direct Trade (light roast)
Grind settings: 7
Grind amount: Set to double 14+ seconds (or until everything is ground)
Default temperature: Medium (default setting: 93°C)
TIP #1: We recommend to keep the bean hopper empty and always pour the precise dose of coffee you want to grind right before grinding. This will prevent coffee from going stale.
IMPORTANT! Before Pulling the First Espresso Shot!
- Before pulling your first espresso, run 2-3 blind shots.
- When dialing in espresso, use the CUSTOM 2 CUPS program, which you can find under the MENU button.
- Before pulling a shot, place your zeroed-out scale with a cup on a drip tray right under the portafilter.
- Always use a freshly roasted coffee,
What is a Blind Shot?
A blind shot is nothing more than rinsing the group head and portafilter with hot water to set the optimal temperature of all parts that will come in contact with the coffee. This will not only ensure the optimal temperature of the espresso but also prevent an unpleasant sour taste.
So how do you pull a blind shot? Simply press 1 or 2 cup button with an inserted portafilter (with the double-wall basket), and repeat at least twice. You can keep your cups under the portafilter when you are running blind shots, and the water will also preheat. Just don’t forget to pour out the water and dry the cups before you start pulling espresso ;).
Always change only one variable at a time.
1. Time of Extraction – Shot time
The Breville Barista Pro will display the time of the extraction process. This is important since time is a metric in which we measure the changes we did to the variables such a grind size, temperature, tamping, etc.
When dialing in your espresso, the general rule of thumb is to aim for 25-30 seconds time of extraction for a double shot and around 15-20 seconds for a single shot. The moment we manage to reach the extraction time and the desired amount of liquid, it is appropriate to fine-tune the espresso according to our taste preferences.
2. Tamping
There are two important factors when it comes to tamping which will help to achieve good extraction:
- Even level of your tamp
- Consistent tamping force

On the other hand, the tamping force is a hotly debated topic. From our experience, applying different force while tamping will influence the flow rate – how quickly is coffee being extracted. The important part isn’t whether you are using 15 pounds of pressure or 30, but whether you always use the same pressure. Consistency, in this case, is paramount.
If you have a hard time applying the same pressure while tamping with the stock tamper, we highly recommend purchasing a 2 in 1 coffee distributor and tamper – Amazon link. This will help you achieve repeatable results and make the process of dialing in easier.
Suppose you want to learn more about how to set up your palm tamper and distributor? In that case, we recommend checking out our dedicated article, where we explain in detail the benefits and proper use of this simple yet very helpful tool.
EXAMPLE: We have weighted and ground 17,5 g (0.62 oz) of coffee beans into the portafilter for two consecutive shots. While tamping, we’ve applied 10 pounds of pressure in the first shot vs. 40 pounds for the second shot.
RESULT: We aimed for 35 g of coffee in the cup for both shots. It took 19 seconds to pull the lightly tamped shot vs. 24 seconds for the firmly tamped shot. This unevenness of extraction would make dialing-in problematic since we want to use time as a metric to measure changes we did to other variables such as grind size, dose, etc.
3. Dose
Generally, when dialing in espresso, you want to keep your coffee dose constant. According to Breville, the two-cup basket is designed for approximately 16-19 g (0.62-0.67) of ground coffee. The common practice would be to start with a dose somewhere in the middle of the recommended range, which in this case is 17,5 g.
There isn’t really a low limit for the amount of coffee grounds you can put in a double shot basket, so you can put 15 g of coffee in a 19 g basket. On the other hand, try not to exceed the upper limit of the basket.
When choosing the optimal dose of coffee, it is also recommended to consider the roast level of a coffee. The darker the level of a roast, the easier it is to extract solubles from the ground coffee. For this reason, it is ok to use a higher dose of coffee when using darker roasts and a lower dose for lighter roasts.

CASE STUDY – 1st Pull: Our Barista Pro is warmed up (see IMPORTANT! Before Pulling the First Espresso Shot!) with grind settings set to 7. We have weighted and ground 17,5 g of coffee beans into the preheated portafilter.
From the menu, we selected the Custom icon with 2 cups, inserted portafilter with tamped coffee, and pushed the 2 cup button to start the extraction. When you’ve reached 80-90 % of the desired amount of espresso in the cup, press the 2 cup button again to finish the extraction.
RESULT: We’ve extracted 35 g of liquid in 19 seconds. The espresso is watery and strongly acidic.
TIP #2: We recommend using precision scales with a resolution of 0.1 g or higher. If you don’t have one yet, we strongly recommend buying one. On the following Amazon links, you can check out our two favorite scales that we use, best value for money and a budget option.
TIP #3: Since the flow of coffee doesn’t stop immediately, you will have to stop the extraction a few seconds before you’ve reached the desired amount of coffee in the cup. We can’t give you the exact time since every scale has a different lag. Depending on your particular scale, you will have to find the right moment to stop the extraction process to get the desired yield.
4. Grind Settings
A great feature of the Breville Barista Pro is the high resolution of 30 different grind settings that you can choose from, which allow you to fine-tune your espresso.
Grind setting (how fine or coarse are your coffee grounds) affects your flow rate – how quickly is the coffee being extracted. The rule is that the finer you’ll grind your coffee, the slower the coffee will flow from the portafilter and vice versa.
Even though dialing the grinding setting is as simple as twisting a knob, finding the right grind setting for a particular coffee always takes a bit of trial and error and may be frustrating at times.
So what is the best grind size for espresso? Depending on the roast level of your coffee, you can roughly estimate the roughness of grinding. Generally, darker roasts require you to grind coarser, while lighter roasts to grind finer. It is not possible to say the exact grind setting you should choose for a particular coffee, as the coarseness of grinding is also affected by other factors such as freshness of the coffee.
When you change the settings on the grinder of your Barista Pro, it always takes one or two baskets of coffee before the grinding gets settled, so don’t rush to make other changes quickly.
As I mentioned earlier, you want to grind your coffee so that when you pull the shot, the espresso will take around 25 – 30 seconds to extract. Extraction times of other espresso drinks, such as ristretto or lungo, are in direct proportion to the weight of the resulting beverage.
Examples of bad extractions:
Under extracted coffee – flows quickly – watery, acidic, lacks body.
Over extracted coffee – barely dripping – harsh, unpleasantly bitter, astringent.
INTERESTING FACT: Even if you buy the same coffee, you will likely need to readjust the grinder since the beans’ freshness also affects the flow rate of extraction.
CASE STUDY – 2nd Pull: For the second shot, we have kept the same dose of 17,5 g, but since the extraction was way too quick, we have decided to set the grinder 2 steps down to 5. Everything else was kept the same. One dose of coffee gets ground and discarded since it contains a mix of old and new grinds. We grind another dose of coffee and pull another shot (make sure all the parts that come in contact with coffee are preheated).
RESULT: We’ve extracted 35g of liquid in 28 seconds. The espresso is much better now. The taste is much more balanced but still slightly more acidic than we would like in our perfect cup. Overall the coffee aroma and sweetness are much more developed in this cup.
5. Water Temperature
One of the premium features of the Breville Barista Pro is the ability to change brewing temperature. According to Breville support, the default brewing temperature of your Barista Pro is set to 93°C (199°F) and allows you to adjust the temperature by 1°C. The temperature range you can choose from starts at 91°C (196°F) and can go as high as 95°C (203°F).
Wondering how does water temperature affects espresso extraction? The hotter the water, the more solubles you are going to extract from the coffee puck. Changing a water temperature is a good way to “polish” already pretty good-tasting espresso. For example, if you have slightly unpleasant acidity in your espresso, you may want to raise the temperature to mitigate the flavor. Or, if there is a noticeable harshness in the cup, you may want to drop the temperature a little.
Generally recommended water temperatures according to the roast level of coffee:
91°C – Dark roasts
91°- 92°C – Medium roasts
93°- 95°C – Lighter roasts

CASE STUDY – 3rd Pull: In our third shot, we have kept the same dose of 17,5 g and the same grind settings. Since we still encountered slightly more acidity than we would like in our perfect cup, an easy way to make a small change to the taste profile is to change the brewing temperature. In this case, we have decided to raise the temperature by 2°C, to 95°C. The temperature changes won’t be as noticeable as changes to other variables, such as grind settings, dose, or yield, so you don’t have to be afraid of making bigger adjustments.
RESULT: We’ve extracted 35 g of liquid in 28 seconds. The espresso has a nice sweetness and a perfect balance of acidity and bitterness, as well as a rich body and pleasant mouthfeel. This is our perfect cup.
TIP#4: Ask your local roaster about the recommended temperature for the particular coffee you are buying. This will give you a good starting point when dialing in your espresso.
6. Ratio – Yield
The ratio is a variable that tells us how many grams of coffee liquid we’ve extracted from coffee grounds in the extraction process. Having the correct ratio – the weight of the coffee grounds to the weight of the extracted liquid in the cup, is crucial. By changing the ratio of the coffee grounds to the water being pushed through the coffee puck, we can get different types of espresso with dramatically different taste profiles. You can read below about the effects of different ratios on the final taste of espresso.
Taste profiles (medium to lightly roasted coffee):
Ristretto – tends to be sweeter, with a strong body, more intense coffee flavor, and less bitterness than standard espresso. (1:1 – 1:1.5)
Espresso – tends to have a nice balance between acidity and bitterness with sweet overtones and slightly less body than ristretto. (1:1.5 – 1:2.5)
Lungo – tends to be less intense, more watery with noticeably less body and more pronounced bitterness and acidity. (1:3+)
TIP#5: We recommend starting with a fixed ratio depending on the style of espresso you are going for. For example, if you prefer the sweeter taste of ristretto, you may want to start with a ratio of 1:1.2. Pull a shot, and according to the resulting taste, adjust if necessary.
World barista champion and coffee expert James Hoffman considers ratio to be “probably the most important thing to control in order to have consistent and repeatable tasting espresso.” Also, keep in mind that even a slight difference of just 2-3 grams of water can make a significant difference in a taste of an espresso.
TIP#6: We strongly recommend weighing the extraction output instead of the volume of the liquid (due to crema, which can vary noticeably depending on the freshness of the beans).
Tips & Tricks – Summary
- Keep everything preheated
- Pull 2-3 blind shots before your first espresso
- Aim for 25-30 seconds time of extraction
- Keep your dose constant
- Use grind settings as the primary variable to change when dialing in your espresso
- Tamp consistently
- Change the temperature to “polish” the taste of your coffee
- Choose ratio according to the type of espresso you want to prepare, and keep it constant
How to Froth Milk with Breville Barista Pro
When frothing milk, we want to achieve a glossy and silky smooth texture perfect for creating latte art or simply enjoying your favorite coffee drink. To achieve the ideal texture of the milk, it is essential to understand the steaming process, so you can make it perfect every time.
The steaming/frothing process has two phases:
1. The First Phase – Creating Foam
Takes approximately 1/2 (or 20 – 25 seconds) of total steaming time.
The purpose of the first phase is to inject air bubbles into the milk, which creates thick foam. The process is done with the very tip of the steam wand, which should be “kissing” the surface of the milk, creating an intermittent slurping sound. The pressure of the steam coming out of the wand drags the surrounding air into the milk, which then creates big bubbles. The more bubbles you’ll blow into the milk, the foamier your milk is going to be. This phase you want to do rather quickly.
2. The Second Phase – Texturing Milk
Takes approximately 1/2 (or 20 – 25 seconds) of total steaming time.
In this phase, the steam and swirling motion of the milk is used as a whisk, which breaks down the big bubbles that we’ve made in the first phase into microscopic pieces. This results in a slightly thickened foam with a very delicate, soft, and silky smooth texture called among baristas as microfoam.
IMPORTANT! Before You Start Steaming Milk
- For steaming, use cold milk (for easier frothing, use whole milk)
- Fill the milk jug between the MIN and MAX markings
- Purge your steam wand momentarily until steam starts coming out
Purging the Steam Wand
Position the steam wand over the drip tray and turn the dial to the steam symbol to start steaming. Wait a couple of seconds until steam starts coming out from the tip then, turn the STEAM dial back to a vertical position to stop steaming.
10 Steps You Need To Know To Froth Milk Perfectly
1. Purge your steam wand momentarily until steam starts coming out.
2. Lift the steam wand, so it is tilted approximately 45° away from the machine.
3. Insert the steam wand into the spout of the milk jug with the steam wand tip dipped below the surface of the milk (not lower than the joint of the tip). The optimal position of the tip for steaming is either at 3 or 9 o’clock, also make sure to hold the jug at a slight angle.
4. Creating foam – approximately 20 – 25 seconds
Turn on the STEAM dial to initiate frothing. While keeping the correct steaming position slightly lower the jug, so the very tip of the steam wand is “kissing” the surface of the milk, creating an intermittent slurping sound. This will start creating foam by blowing bubbles into the milk as well as a spinning vortex, which will be essential in the next step.
5. Texturing milk – approximately 20 – 25 seconds
When you have created a sufficient volume of foam for the drink you are preparing, slowly raise the jug back up so the tip of the steam wand is submerged under the surface of the milk. Continue stretching the milk with the whirl until the jug starts getting hot to the touch (approximately 140°F or 60°C).
6. Once the desired temperature has been achieved, turn the STEAM dial back to the vertical position (make sure to keep the tip of the steam wand submerged until the very end of the process).
7. Set aside the milk jug.
8. Clean the steam wand with a damp cloth, then position the steam wand over the drip tray and purge it momentarily to clean the inside of the wand.
9. Tap the milk jug if you notice any bubbles slightly larger in size than the rest.
10. With the jug, give the milk a swirl so the milk and foam can mix well together. Milk that is ready to be poured should have consistency and gloss of white paint.
TIP#7: If the surface of the milk has a matt finish, it indicates that the milk and the foam started to separate. Reincorporate the milk and the foam with a gentle swirling motion of the jug.


Example 1. Properly frothed milk should have a creamy/marshmallowy consistency. When poured into the cup, it should create a nice glossy meniscus.
Example 2. Cappuccino made with Breville Barista Pro.
Get the most out of your Breville Barista Pro
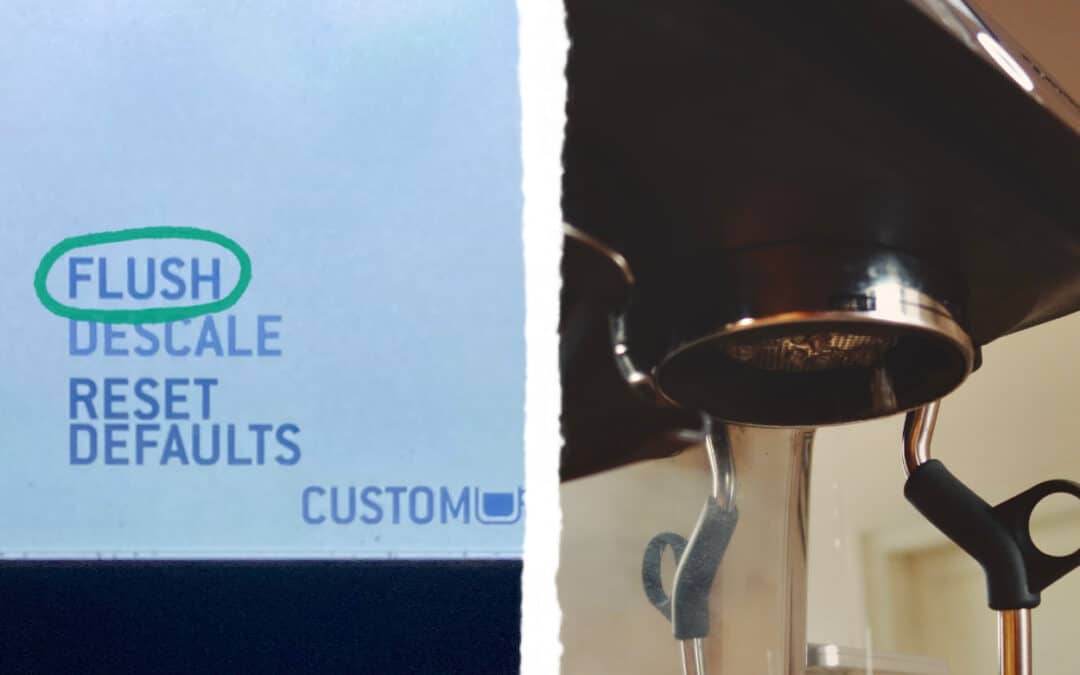
To get the most out of your Breville Barista Pro regular maintenance is essential. You can learn more about the two most important cleaning cycles: the Flush Cleaning Cycle, and the Descaling Cycle in our dedicated articles.


Thank you so much! This was very helpful. Do you have any recommendation on setting using illy Med roast coffee beans?
Hi Rosal, I’m glad you found it helpful! My biggest advice for you is to purchase freshly roasted coffee from a local roaster. With store-bought coffee, it will be very difficult to properly dial in the beans, since they are most likely stale by the time you put them in a machine, and the water will flow thru the coffee grounds very quickly.
Hello. This guide is very useful. I am only wondering what it means Grind setting 7. Do you mean the setting with the knob on the left side of the machine or the internal ? What should be the setting for the internal grind? And then I guess adjusting the steps (0-30) is also a bit of trial and error.
Hi! This guide is extremely helpful. I am starting to experiment with the Barista pro and it helps a lot. I got a queston regarding the Grind settings of your case. You mention Grind setting 7. Do you mean on the upper bur (inside the machine) or the external setting (with the knob on the left side). Or both of them on 7?
From what I understood, in principle with 17.5g grounded coffee I should be extracting 35ml espresso at around 25sec. I guess including pre-infusion. Is that correct? (with small adjustments according to roasting of beans).
If my coffee is still a bit bitter, should I adjust temperature?
Hi Loukas, I’m happy you found my article helpful! And regarding your questions…
1. Grind setting 7 is the setting I would have on the grind size dial. The purpose of mentioning the grind settings wasn’t to clearly indicate which setting is “correct” (since I can’t tell what kind of coffee you have) but to give people a reference point from which I further demonstrate how the process of dialing-in works.
Regarding upper burr settings, I’m currently at number 2, but I only change it once I cannot get the times of extraction that I need with the grind settings knob.
2. Yes, you understand the principle correctly. As a general rule, when you are dialing in your new beans, it’s a good idea to aim for a 35ml of espresso at around 25 sec from 17,5g of ground coffee, including pre-infusion (although some would argue about including the pre-infusion). Once you are in the right ballpark, let your taste buds be your guide! So feel free to completely break the rules. For example, my favorite recipe with my Brazilian medium-roasted coffee I have on hopper right now is 18g dose, 26g of espresso out, in around 18-20 seconds, and temperature on the lowest setting (but to get to this point, I had to start somewhere, which comes back to the initial rule described above).
3. I see you have some questions regarding perfecting the taste of your espresso, and I think I have a good article on that, so that’s something you may want to check out!
From your comment, I can tell you are grasping the art of making an espresso quickly, so you should be able to figure it out in no time! Most importantly, don’t forget to enjoy the learning process :).
An excellent article Kuba. Just noticed it was posted 11 months ago so not sure if your still responding to comments?
I’ve had my Barista Pro for 4 months and it has been a very time consuming and frustrating experience. I think the Barista Pro has many good points however it is fundamentally flawed in relation to shot to shot inconsistency which means a lot of wasted coffee. I initially thought the shot inconsistency related to the limitations of the in-built grinder so I then purchased an expensive Niche Zero grinder however shot consistency remained much the same. I then realised the issue was directly related to the temperature and/or pressure instability of the machine. Under normal operating procedure, it is very difficult to get any degree of heat sink into the machine. Sure, all the advertising hype is about the ThermoJet 3 second warm up time and then it’s ready to pull an espresso however the machine is still dead cold and if you run several blind shots to try and warm things up, the PID lowers the brew temp if it senses no puck resistence. Also these blind shots only heat up the portafilter and do very little to heat the actual group head. By trial and error, I have managed to improve shot to shot consistency by swapping out the non-pressurised basket for the pressurised basket (dual Wall) and running several blind shots over a 10 minute period then swapping back to the non-pressurised basket before dosing and then pulling an espresso shot. This method seems to keep the PID brew temp stable and really gets heat into the group head. This is a lot of extra workflow procedure to make up for the Barista Pro’s design flaws. It would have made a huge difference if Breville designed this machine with an integrated heated group head and pressure gauge. Also FYI, I weigh my beans in and weigh the espresso out with a quality espresso scale. I use a bottomless portafilter, IMS 20g basket, RDT beans prior to grinding, Niche Zero grinder, WDT puck prep, consistent tamp and puck screen. My work flow is exactly the same from shot to shot. I now know there is no actual fault with the machine. It is a design flaw of the Barista Pro so for this reason, I am approaching Breville for a full refund. I actually believe Breville is a very reputable company and I have supported them for approx 50 years here in Australia however the Barista Pro falls short in some very crucial areas which is surprising to me when you consider the R&D input and successs of their Dual Boiler.
Kuba I would love to here your thoughts about my post. Thanks
Cheers
Stephen