The Nesco Deluxe Food VS-12 Vacuum Sealer (aka Maxxo VM profi in Europe and Pro-Line VS-C1 in Australia) is a popular choice for those who want to keep their food fresh as long as possible. If you are a first-time user and you’re not sure how to use your Nesco Vacuum Sealer, you’ve come to the right place. In this guide, we will walk you through a two-step process of creating a bag from the vacuum sealer rolls and sealing the bag.
For those who want to learn the best practices, vacuum sealing tips, and how to make sure your Nesco vacuum sealer lasts for years to come, we highly recommend reading the article in its entirety.
How to Use the Nesco VS-12 Deluxe Vacuum Sealer
There are two steps you need to do in order to vacuum seal any item:
1. Creating a Bag From Vacuum Sealer Rolls
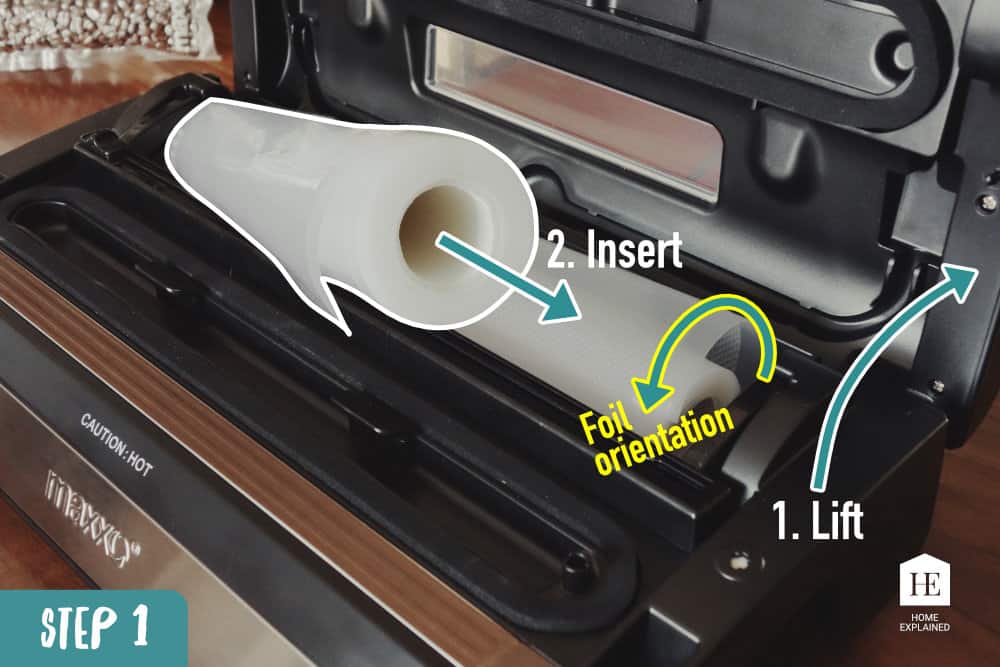
Step 1
Open the vacuum sealer lid and insert the plastic roll into the back compartment as shown in the image (so it bends down).
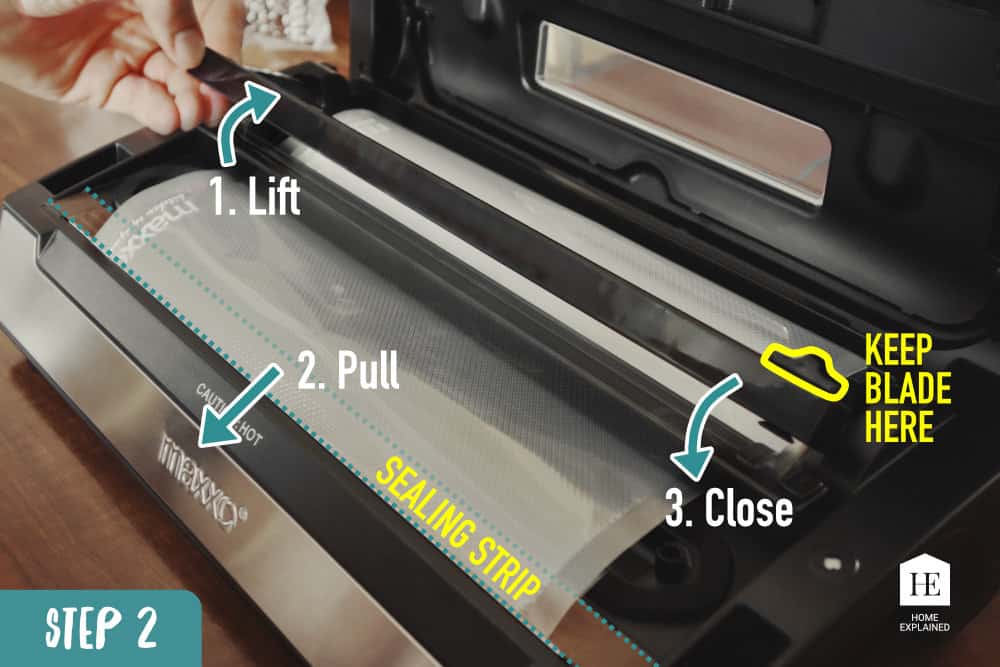
Step 2
Lift the cutter rack (make sure the blade is on a side), pull enough of the bag material to cover the sealing strip, and close the cutter rack.
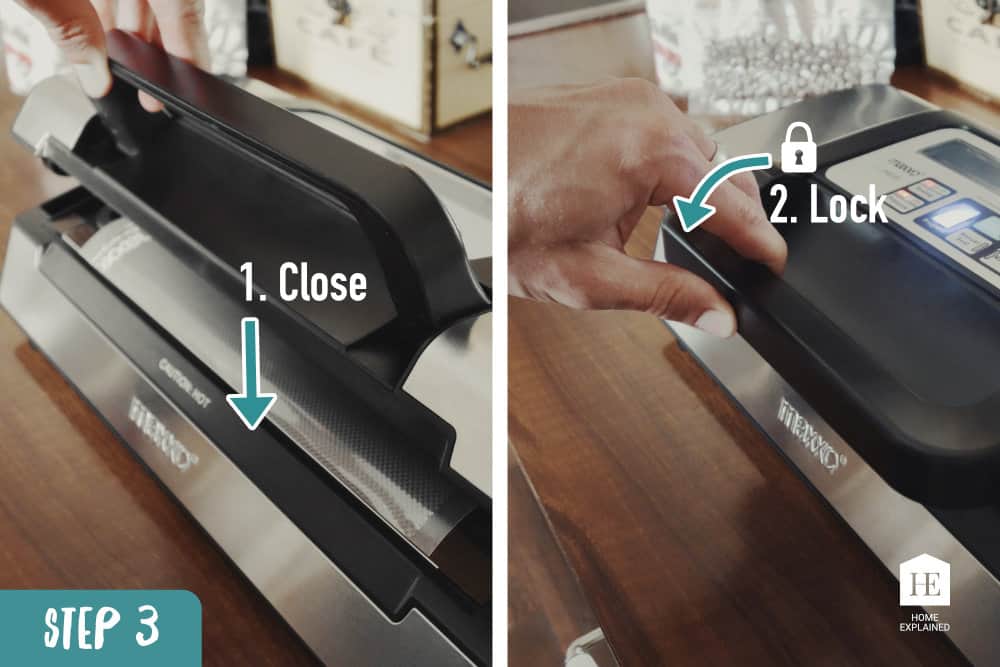
Step 3
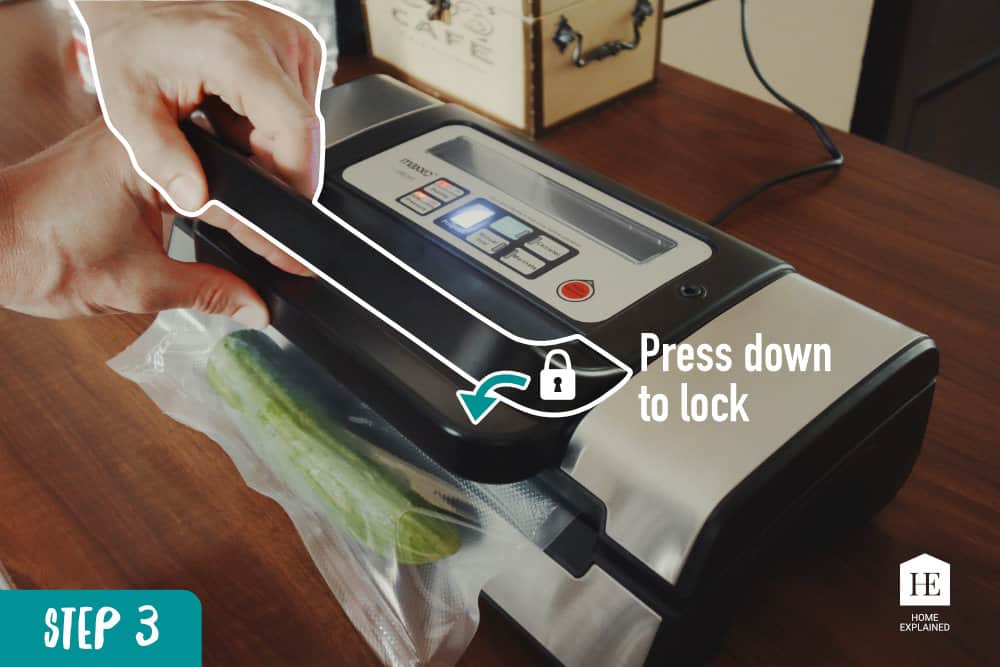
Close the lid and press down the handle to the locked position.
Tip: Make sure the bag material only covers the sealing strip to minimize waste.
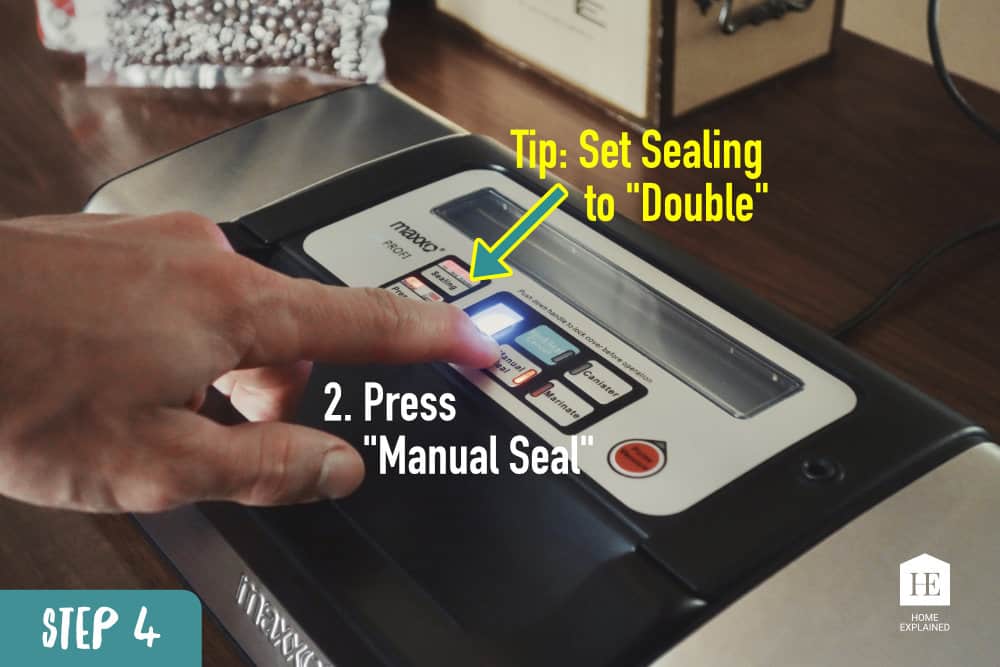
Step 4
To seal the edge of the bag, press the “Manual Seal” button. A countdown will start on the Progress display once the sealing strip heats up and is ready to seal. When it reaches “0”, the bag is sealed.
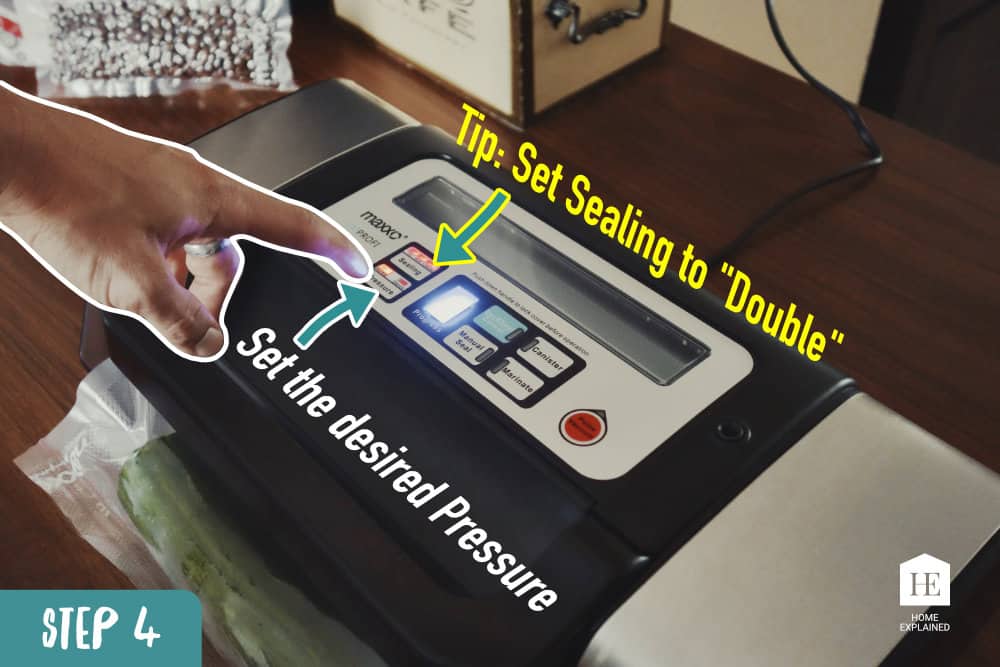
Tip: We recommend setting the Sealing option to “Double” for extra protection against pressure leaks.
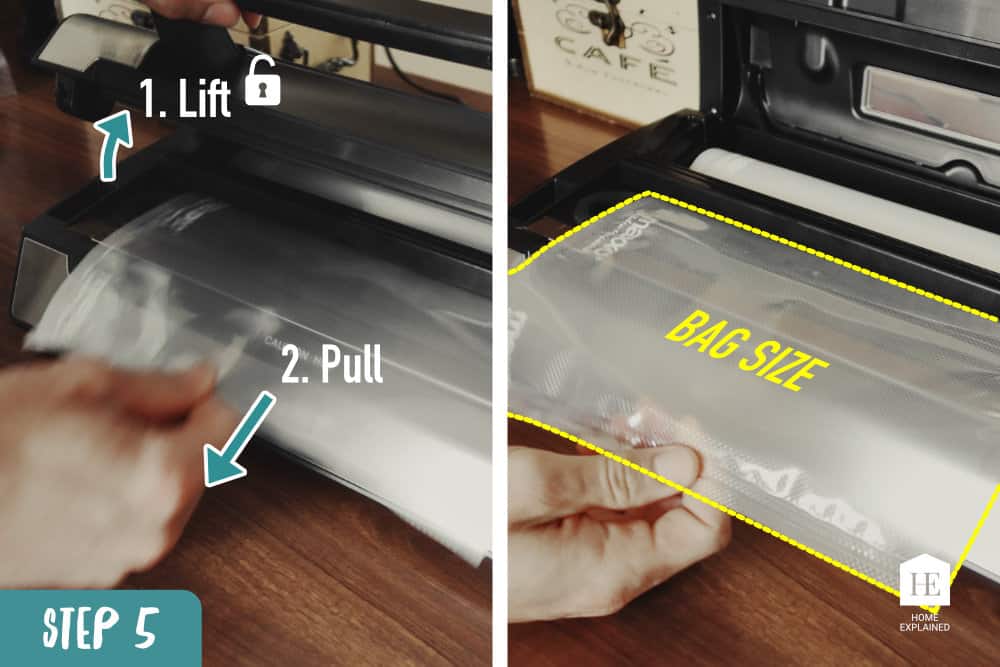
Step 5
Lift the handle to open the lid and pull enough of the roll to make a bag that’s big enough for the item you want to seal.
Tip: Always go for a few inches larger bag than needed. Vacuum bags are reusable but get smaller with every use.
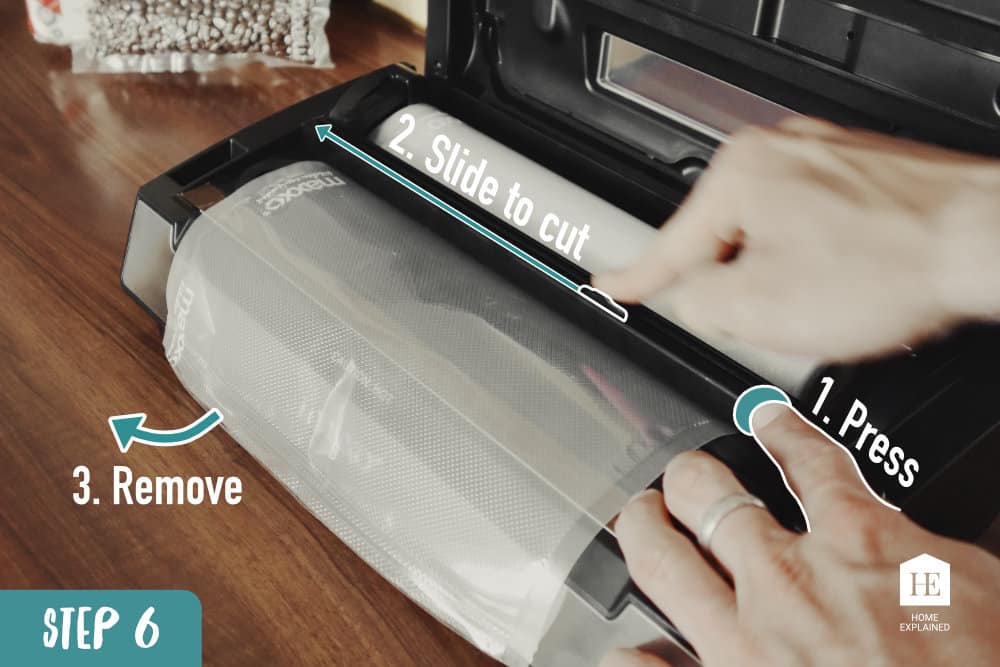
Step 6
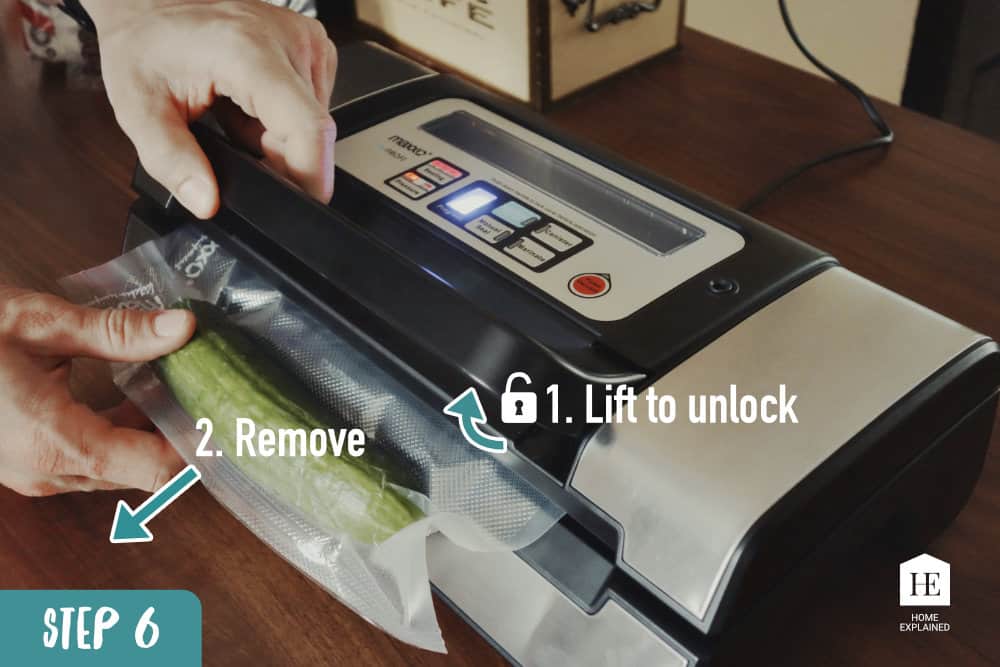
Press down on the cutting rack and slide the blade from side to side to cut the desired bag size and remove the bag! Now we are ready for vacuum sealing!
2. Sealing the Item in the Bag
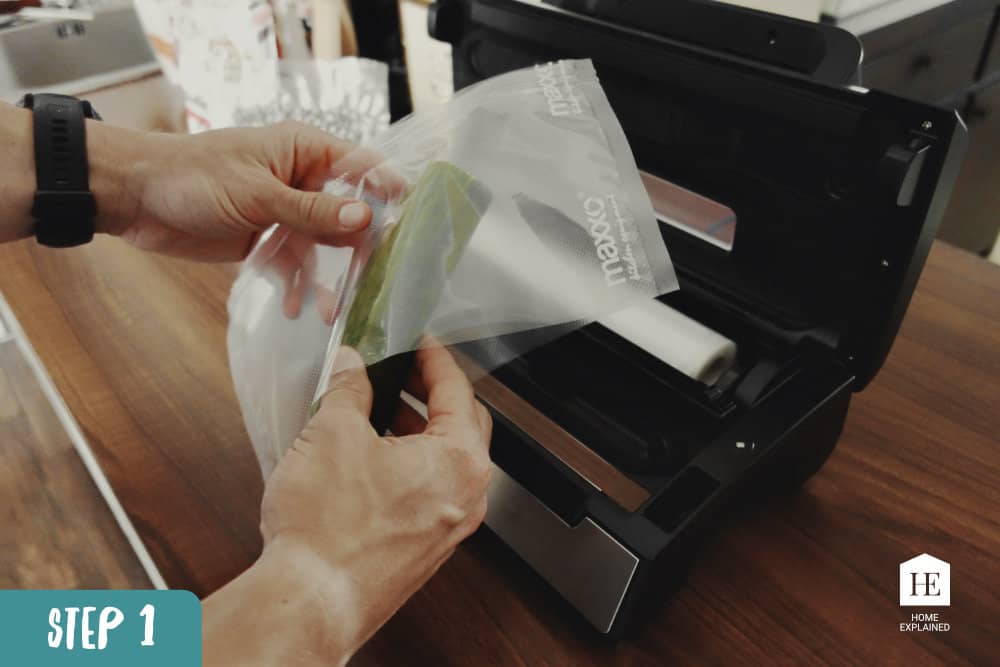
Step 1
Place the food you want to seal in the bag.
Tip: If you want to seal liquids, freeze them first to prevent them from being sucked into the vacuum chamber and damaging the pump.
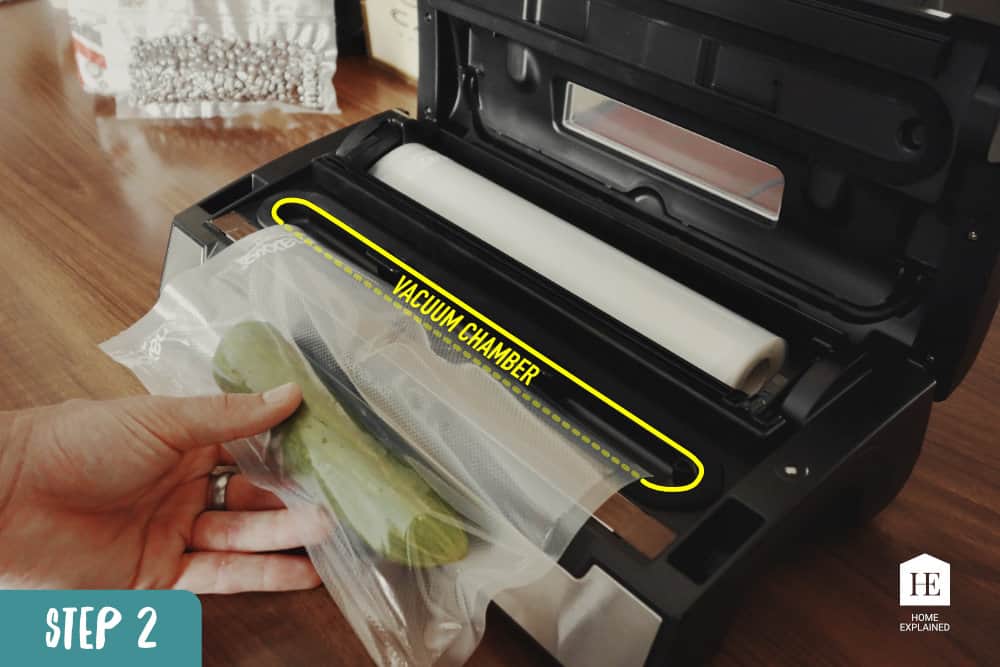
Step 2
With the lid open, place the open end of the bag inside the vacuum chamber. Before sealing, make sure the edge of the bag is clean, dry, and not wrinkled.
Step 4
Set the desired vacuum level with the Pressure button to the “Normal” setting for most food types or the “Gentle” setting for delicate items (berries, cookies, chips, or similar).
Tip: For extra protection against any pressure leaks, you can set the Sealing option to “Double”.
Step 5
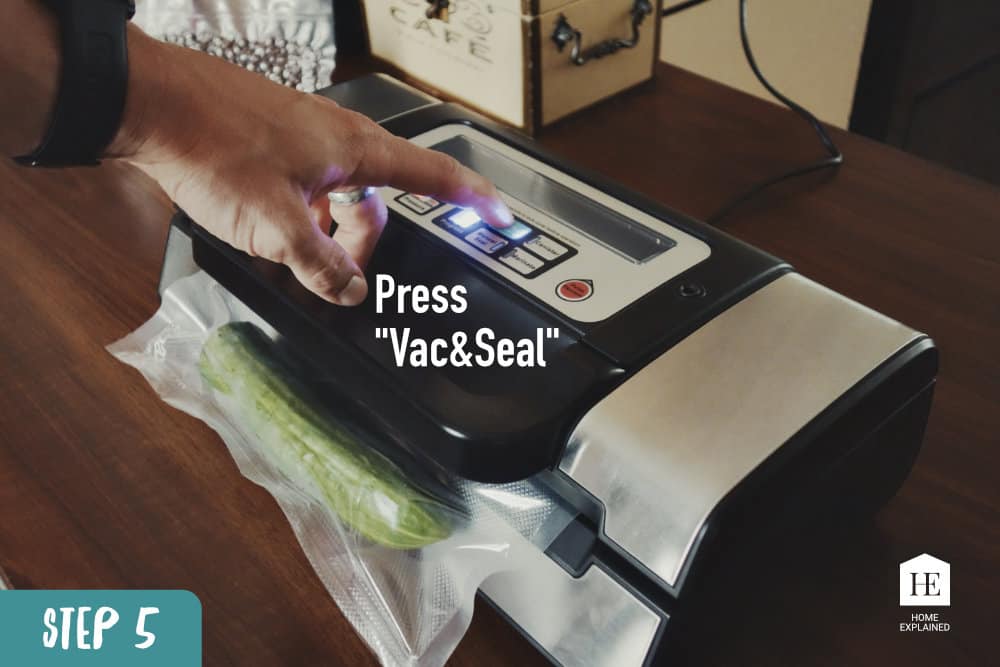
Press the “Vac&Seal” button. The Progress display will show how much time is left until the vacuum sealing process is complete. Once it reaches “0”, the vacuum sealing is done, and the bag is sealed.
Important: The manufacturer states that the appliance should cool down for two minutes between each use.
Important: Do not store your vacuum sealer with the lid latched closed. By doing so, you risk compressing the foam gasket, and the machine may lose its vacuum sealing capabilities.
Nesco Vacuum Sealer Video Guide
For those who prefer a video format, we’ve put together a 2-minute video guide on how to use the Nesco Vacuum Sealer. Just hit play, and you’ll be vacuum-sealing like a pro in no time!




0 Comments